How to Start Knitting for Beginners: Easy Step by Step Guide
Have you always wanted to learn how to knit but weren’t sure where to start? The good news is that knitting is easier to learn than you might think, and you only need a few basic supplies to get started.
In this guide, I’ll walk you through how to start knitting for beginners. It’ll take you step by step, from choosing your first yarn and needles to making your first stitches and finishing your work.
When you’re first learning how to knit, there’s no need to worry about complicated patterns or fancy stitches. Start with the basics, like casting on and making a simple knit stitch. Once you get comfortable with those techniques, you’ll be surprised by how many things you can make.
What You Need to Start Knitting
One of the nice things about knitting is that you don’t need a lot of supplies to get started. A pair of knitting needles and some yarn are all you need to start practicing your first stitches.
Here’s what I recommend for beginners:
- Knitting needles Size: In the US, knitting needles come in numbered sizes, based on how many millimeters in diameter the needle is. A size 4 needle is much skinnier than a size 10 for instance. I recommend starting with a pair of US size 8 (5 mm) or 9 (5.5mm) needles. This is a comfortable size for learning and works well with medium-weight yarn.
- Knitting needle material: A lot of people will recommend bamboo or wooden needles for beginners because the yarn doesn’t slide across it as easily and stitches are less likely to slip off. I personally do not like wooden needles, so I would recommend metal needles but choose whatever feels right for you. Or, what you have access to.
- Yarn: Choose a medium-weight (worsted weight #4) yarn in a solid color. You may prefer a lighter color as it’ll be easier to see your stitches. Avoid fuzzy, textured, or very dark yarns when you’re first learning. FYI: If you are using a size 9 needle or larger, you can also start with a thicker weight yarn (bulky #5).
- Scissors: A small pair of scissors is all you need to cut your yarn when you’re finished.
- Tapestry needle: A large, blunt-tipped needle makes it easy to weave in loose yarn ends when your project is complete.
You don’t need to spend a lot of money on supplies or buy a complete knitting kit. Start with the basics, practice a few stitches, and add more tools as you learn new techniques.
How to Start Knitting for Beginners Step by Step
Making a Slip Knot
The first step in knitting is making a slip knot. This creates the first loop on your needle and gives you a starting point to cast on the rest of your stitches.
To make a slip knot:
- Leave a short tail of yarn, about 6 inches long.
- Make a loop with the yarn, crossing the working yarn over the tail.
- Pull a small loop of the working yarn through the first loop.
- Place the new loop onto your knitting needle and gently tighten it.
Your slip knot should fit snugly around the needle but still slide back and forth easily. Avoid pulling it too tight, since you’ll need room to work your first stitches.
Once your slip knot is on the needle, you’re ready to cast on!
Casting On
Once you’ve made your slip knot, the next step is to cast on your stitches. Casting on creates the foundation row of stitches on your knitting needle that you’ll use to start knitting.
There are several ways to cast on, but the knitted cast-on method is a good choice for beginners because it uses a similar motion to the basic knit stitch. The easiest method is probably the backward loop method (aka thumb cast on) but I’m not recommending that because it’s not a good cast on to use for projects, so I’d recommend learning a cast on that you can use for your future knitting projects.
Here’s how to do it (if you’re right-handed):
- Hold the needle with the slip knot in your left hand and the empty needle in your right.
- The slip knot is your first stitch and every new cast on stitch will go on top of it on the left needle.
- Insert the right needle into the slip knot from front to back, going behind the left needle. It’s like forming an X with the needles with the tip of the right needle behind the left needle.
- Wrap the working yarn (which is the yarn attached to the ball) around the right needle counterclockwise.
- Turn, or scoop the right needle to pull the yarn through the loop to create a new stitch, being sure to leave the original stitch on the left needle.
- Transfer the new loop onto the left needle and gently pull on the yarn to tighten it.
- Repeat until you have the number of stitches you need.
For your first practice piece, try casting on about 15 stitches. That’s enough to get comfortable with the technique without making your project too wide.
Don’t worry if your stitches look a little uneven at first. The important thing is to keep them loose enough that you can easily insert your needle when you start knitting.
Video for How to Cast On
Here is a very beginner-friendly video for how to do a knitted cast on. At the end it also includes the easier backward loop method, so if you feel like you want to start with the easier cast on option, you’ll see that in this video as well.
Learn the Knit Stitch
Now that you’ve cast on, it’s time to start knitting! The knit stitch is one of the two basic stitches used in knitting, along with the purl stitch. Once you learn the knit stitch, you can make any project, including scarves, dishcloths, and blankets.
You created a knit stitch when you cast on, so this is the same process. But if you started with a different cast-on method, here’s how to make a knit stitch:
- Hold the needle with your cast-on stitches in your left hand and the empty needle in your right hand.
- Insert the tip of the right needle into the first stitch on the left needle, from front to back. The two needles will form an X, with the right needle behind the left.
- Wrap the working yarn (the yarn attached to the ball) counterclockwise around the right needle.
- Turn, or scoop, the right needle to pull the yarn through the stitch, creating a new loop/stitch.
- Slide the original stitch off the left needle, leaving the new stitch on the right needle.
- Repeat these steps until you’ve knitted all the stitches on your left needle.
As you work across the row, each stitch you knit will gradually move from your left needle to your right needle.
Beginner Tip: Try not to make the stitches too tight or too loose. They should slide easily back and forth on the needle. With practice, you’ll develop a more consistent tension and your stitches will become more uniform.
Knitting Rows
Once you’ve knitted all the stitches on your left needle, you’ve completed your first row! Now it’s time to turn your work and start the next row.
Here’s what to do:
- Move the needle holding all your stitches into your left hand.
- Hold the empty needle in your right hand.
- The working yarn, which is attached to the ball, should be at the top of the left needle.
- Insert your right needle into the first stitch and knit across the row, just as you did before.
- Continue turning your work and knitting each row until your practice piece reaches the length you want.
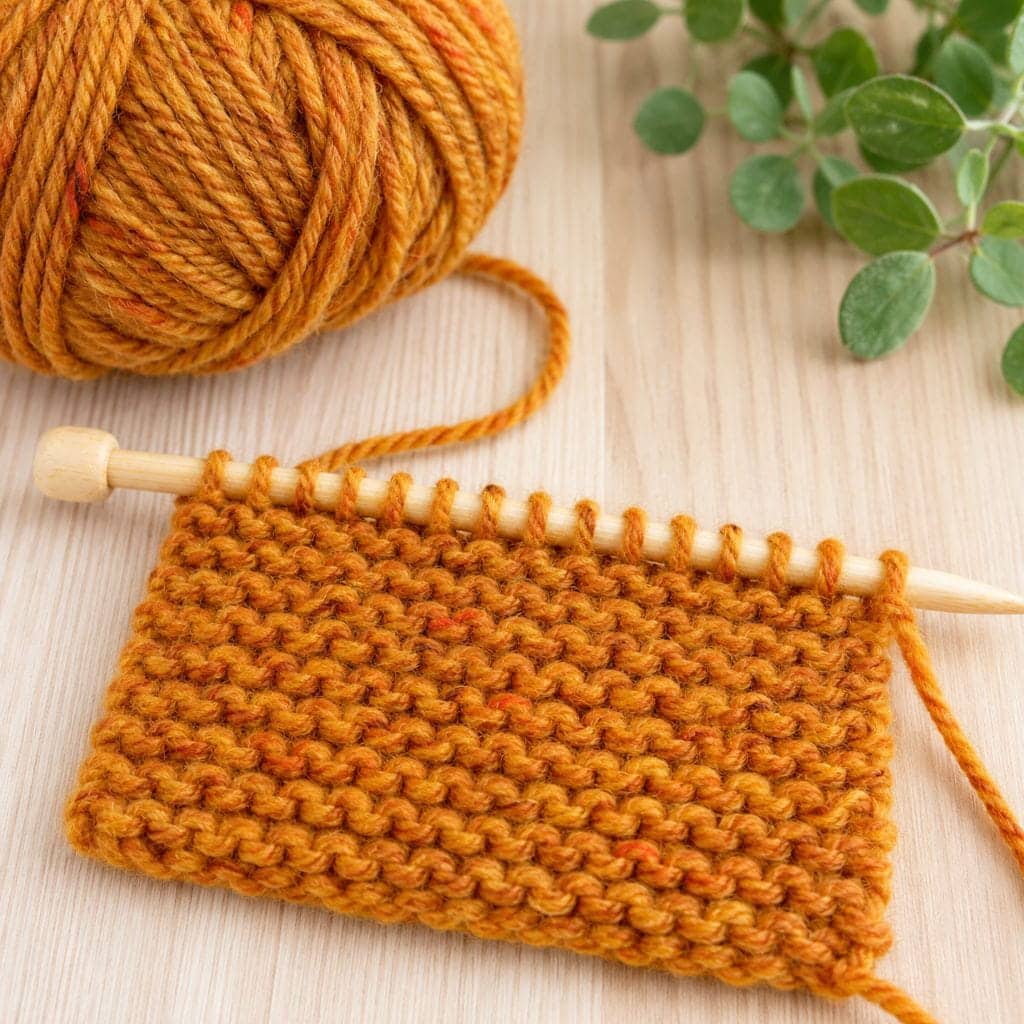
When you knit every stitch on every row, you’re creating a pattern called garter stitch. It’s one of the easiest stitch patterns for beginners and creates a textured fabric with little ridges on both sides.
Video for How to Knit Garter Stitch
This knitting tutorial shows you how to knit the garter stitch. And since that means knitting every row, it’s the perfect way to teach you the knit stitch.
She uses a long-tail cast on for this video, which is actually one of the preferred cast on methods for knitting. I thought it would be good to show you another method, especially since you’ll hear a lot about the long-tail cast on method in knitting patterns.
Binding Off Stitches
Once your knitting reaches the length you want, bind off your stitches. Binding off creates a finished edge that keeps your stitches from unraveling when you remove the knitting needles.
Here’s how to bind off using the basic knit method:
- Knit the first two stitches from your left needle onto your right needle.
- Insert the tip of your left needle into the first stitch you knitted on your right needle.
- Lift that stitch up and over the second stitch, then slide it off the needle. You’ll have one stitch remaining on your right needle.
- Knit another stitch from your left needle onto your right needle.
- Lift the first stitch over the new stitch and off the needle.
- Repeat until you’ve bound off all your stitches and only one loop remains on your right needle.
Cut your working yarn, leaving a tail about 6 inches long. Pull the yarn tail through the remaining loop and gently tighten it to secure your work.
Use a tapestry needle to weave in the loose yarn ends, and you’re done.
Beginner Tip: Try to keep your stitches loose as you bind off. Pulling the yarn too tightly can make the finished edge narrower than the rest of your knitting.
Knitting Tips for Beginners
Learning to knit takes a little practice, and it’s normal to struggle with a few things when you’re first starting out. Here are some tips to make the process easier.
- Don’t pull your yarn too tightly. Tight stitches make it difficult to insert your needles and can slow you down. Try to keep a relaxed grip on your yarn and needles.
- Check the stitch count. It’s easy to accidentally add or drop stitches when knitting. Counting the stitches on the needle after each row helps you catch mistakes before you’ve knit too much.
- Practice a little at a time. You don’t need to spend hours knitting. Even 15 or 20 minutes of practice can help you get more comfortable with the movements.
- Don’t worry about mistakes. Uneven stitches and dropped stitches happen to everyone, especially beginners. They’re part of learning, and most mistakes can be fixed.
One of the biggest challenges when learning to knit is getting comfortable holding the needles and controlling the yarn at the same time. It might feel awkward at first, but eventually the movements will start to feel more natural.
What to Knit
Now that you’ve learned the basics of knitting, it’s time to put your new skills to use! You don’t need to tackle a complicated pattern to make something useful. There are plenty of easy knitting projects that only require the knit stitch.
A simple dishcloth is one of my favorite recommendations for beginners. It’s small enough to finish fairly quickly, gives you plenty of practice making even stitches, and is something you can actually use when you’re done.
Scarves are another great choice because you can practice knitting row after row without worrying about complicated shaping or stitch patterns.
If you’re looking for more inspiration, check out my article on Easy Knitting Projects for Beginners, where you’ll find more simple project ideas to try as you build your skills.
Ready to Start Knitting
Learning how to knit might feel a little awkward at first, but once you get comfortable with the basic stitches, you’ll be surprised by how quickly things start to come together.
The best way to learn is to practice. Start with a small piece of knitting, take your time, and don’t worry if your stitches aren’t perfectly even. Every row you knit will help you build your confidence and improve your skills.
Once you’ve mastered casting on, the knit stitch, and binding off, you’ll have the basic skills you need to start making your own handmade projects. Happy knitting!
Follow me on Pinterest for fun and easy craft projects and ideas. Now that you know How to Start Knitting for Beginners, are you ready to try knitting? Please leave a comment and let me know.

- Knitting vs Crochet: Which Is Easier for Beginners? - October 23, 2026
- How to Start Knitting for Beginners: Easy Step by Step Guide - October 21, 2026
- 10 Easy Needle Felting Projects for Beginners - October 18, 2026